Chapter 23: Running Airflow with Docker
The cleanest way to run Airflow locally is with Docker. All six components from the previous chapter — Scheduler, Webserver, Worker, Triggerer, PostgreSQL, and Redis — run as separate containers managed by Docker Compose. This matches how Airflow runs in most production environments, so what you learn here carries forward directly.
This chapter follows the setup from airflow-docker-wsl-setup, covering Airflow 3.x on Windows via WSL. macOS and Linux users skip section 23.2 and follow the same steps from 22.3 onward. The Docker commands are identical on every platform.
Time to complete: About 15 minutes on a machine with a decent internet connection. Most of that is image download time.
23.1 Prerequisites
Before starting, confirm you have:
| Requirement | Why |
|---|---|
| Docker Desktop (4 GB RAM minimum) | Runs all six Airflow containers |
| WSL 2 with Ubuntu (Windows only) | Provides the Linux environment Docker needs |
| 10 GB free disk space | Docker images are large |
| Python 3.9+ | For writing and testing DAG files locally |
Check Docker memory: Docker Desktop → Settings → Resources → Memory. Set it to at least 4 GB. 8 GB recommended if you plan to run multiple DAGs. Airflow containers will silently fail health checks with less.
23.2 WSL Setup (Windows Only)
macOS and Linux users: skip to section 23.3.
Step 1: Install Ubuntu on WSL
Open PowerShell as Administrator and run:
wsl --install -d Ubuntu
This installs WSL 2 and Ubuntu in a single command. Restart when prompted. After reboot, Ubuntu launches automatically and asks you to create a username and password. Do this before continuing.
Verify the installation:
wsl --list --verbose
  NAME      STATE           VERSION
* Ubuntu    Running         2
The version must show 2. If it shows 1, upgrade:
wsl --set-version Ubuntu 2
Step 2: Connect Docker Desktop to WSL
- Open Docker Desktop
- Go to Settings → Resources → WSL Integration
- Toggle on integration for Ubuntu
- Click Apply & Restart
After Docker Desktop restarts, open your Ubuntu terminal and verify:
docker --version
docker compose version
Both commands should return version numbers. If either fails, restart the Ubuntu terminal and try again. If the issue persists, repeat the Docker Desktop WSL Integration step.
From this point, all commands run inside your Ubuntu terminal, not PowerShell.
23.3 Create the Project Directory
Inside your Ubuntu terminal:
mkdir airflow-docker
cd airflow-docker
mkdir -p ./dags ./logs ./plugins ./config
| Folder | Purpose |
|---|---|
dags/ | Your DAG Python files — Scheduler scans this every 30s |
logs/ | Task execution logs — auto-populated by Airflow |
plugins/ | Custom operators and hooks |
config/ | Optional airflow.cfg overrides |
23.4 Download the Docker Compose File
Fetch the official docker-compose.yaml from the Apache Airflow project. Always use the version-pinned URL:
curl -LfO 'https://airflow.apache.org/docs/apache-airflow/stable/docker-compose.yaml'
This file defines all six services Airflow needs:
Services defined in docker-compose.yaml:
  ┌─────────────────────────────────────────┐
  │  airflow-webserver    → port 8080        │
  │  airflow-scheduler    → reads dags/      │
  │  airflow-worker       → executes tasks   │
  │  airflow-triggerer    → handles sensors  │
  │  postgres             → metadata DB      │
  │  redis                → task queue       │
  └─────────────────────────────────────────┘
The file is maintained by the Apache Airflow community and pins the current stable version. Open it and search for AIRFLOW_VERSION to see which exact version it pulls.
23.5 Create the .env File
echo -e "AIRFLOW_UID=50000" > .env
This sets the file permission user ID for the Docker containers. Without it, Airflow containers may fail to write to the dags/, logs/, and plugins/ folders, producing permission errors that are trivial to avoid upfront but annoying to debug after the fact.
On Linux, you can also use your own UID:
echo -e "AIRFLOW_UID=$(id -u)" > .env
23.6 Initialize Airflow
Before the first start, Airflow sets up its Metadata Database and creates the default admin user:
docker compose up airflow-init
This pulls all required Docker images (takes a few minutes on the first run — the Airflow image alone is ~1.5 GB), creates the database schema, and sets up the default credentials.
Wait for this output:
airflow-init-1  | start_airflow_db executed.
airflow-init-1 exited with code 0
Exit code 0 means success. Press Ctrl + C to return to your prompt.
If
airflow-initexits with code 1, the most common cause is insufficient Docker memory. Go to Docker Desktop → Settings → Resources → Memory and increase it, then rundocker compose down --volumesfollowed bydocker compose up airflow-initagain.
23.7 Start Airflow
docker compose up -d
The -d flag runs all containers in the background (detached mode). Check that everything came up:
docker ps
You should see six containers running:
NAMES                           STATUS
airflow-airflow-webserver-1     Up (healthy)
airflow-airflow-scheduler-1     Up (healthy)
airflow-airflow-worker-1        Up (healthy)
airflow-airflow-triggerer-1     Up (healthy)
airflow-postgres-1              Up (healthy)
airflow-redis-1                 Up (healthy)
All six must show (healthy). If any show (starting), wait 1-2 minutes — the database takes a moment on first start. If any show (unhealthy), see the troubleshooting table at the end of this chapter.
23.8 Open the Web UI
Open your browser and go to:
http://localhost:8080
Log in with the default credentials:
- Username:
airflow - Password:
airflow
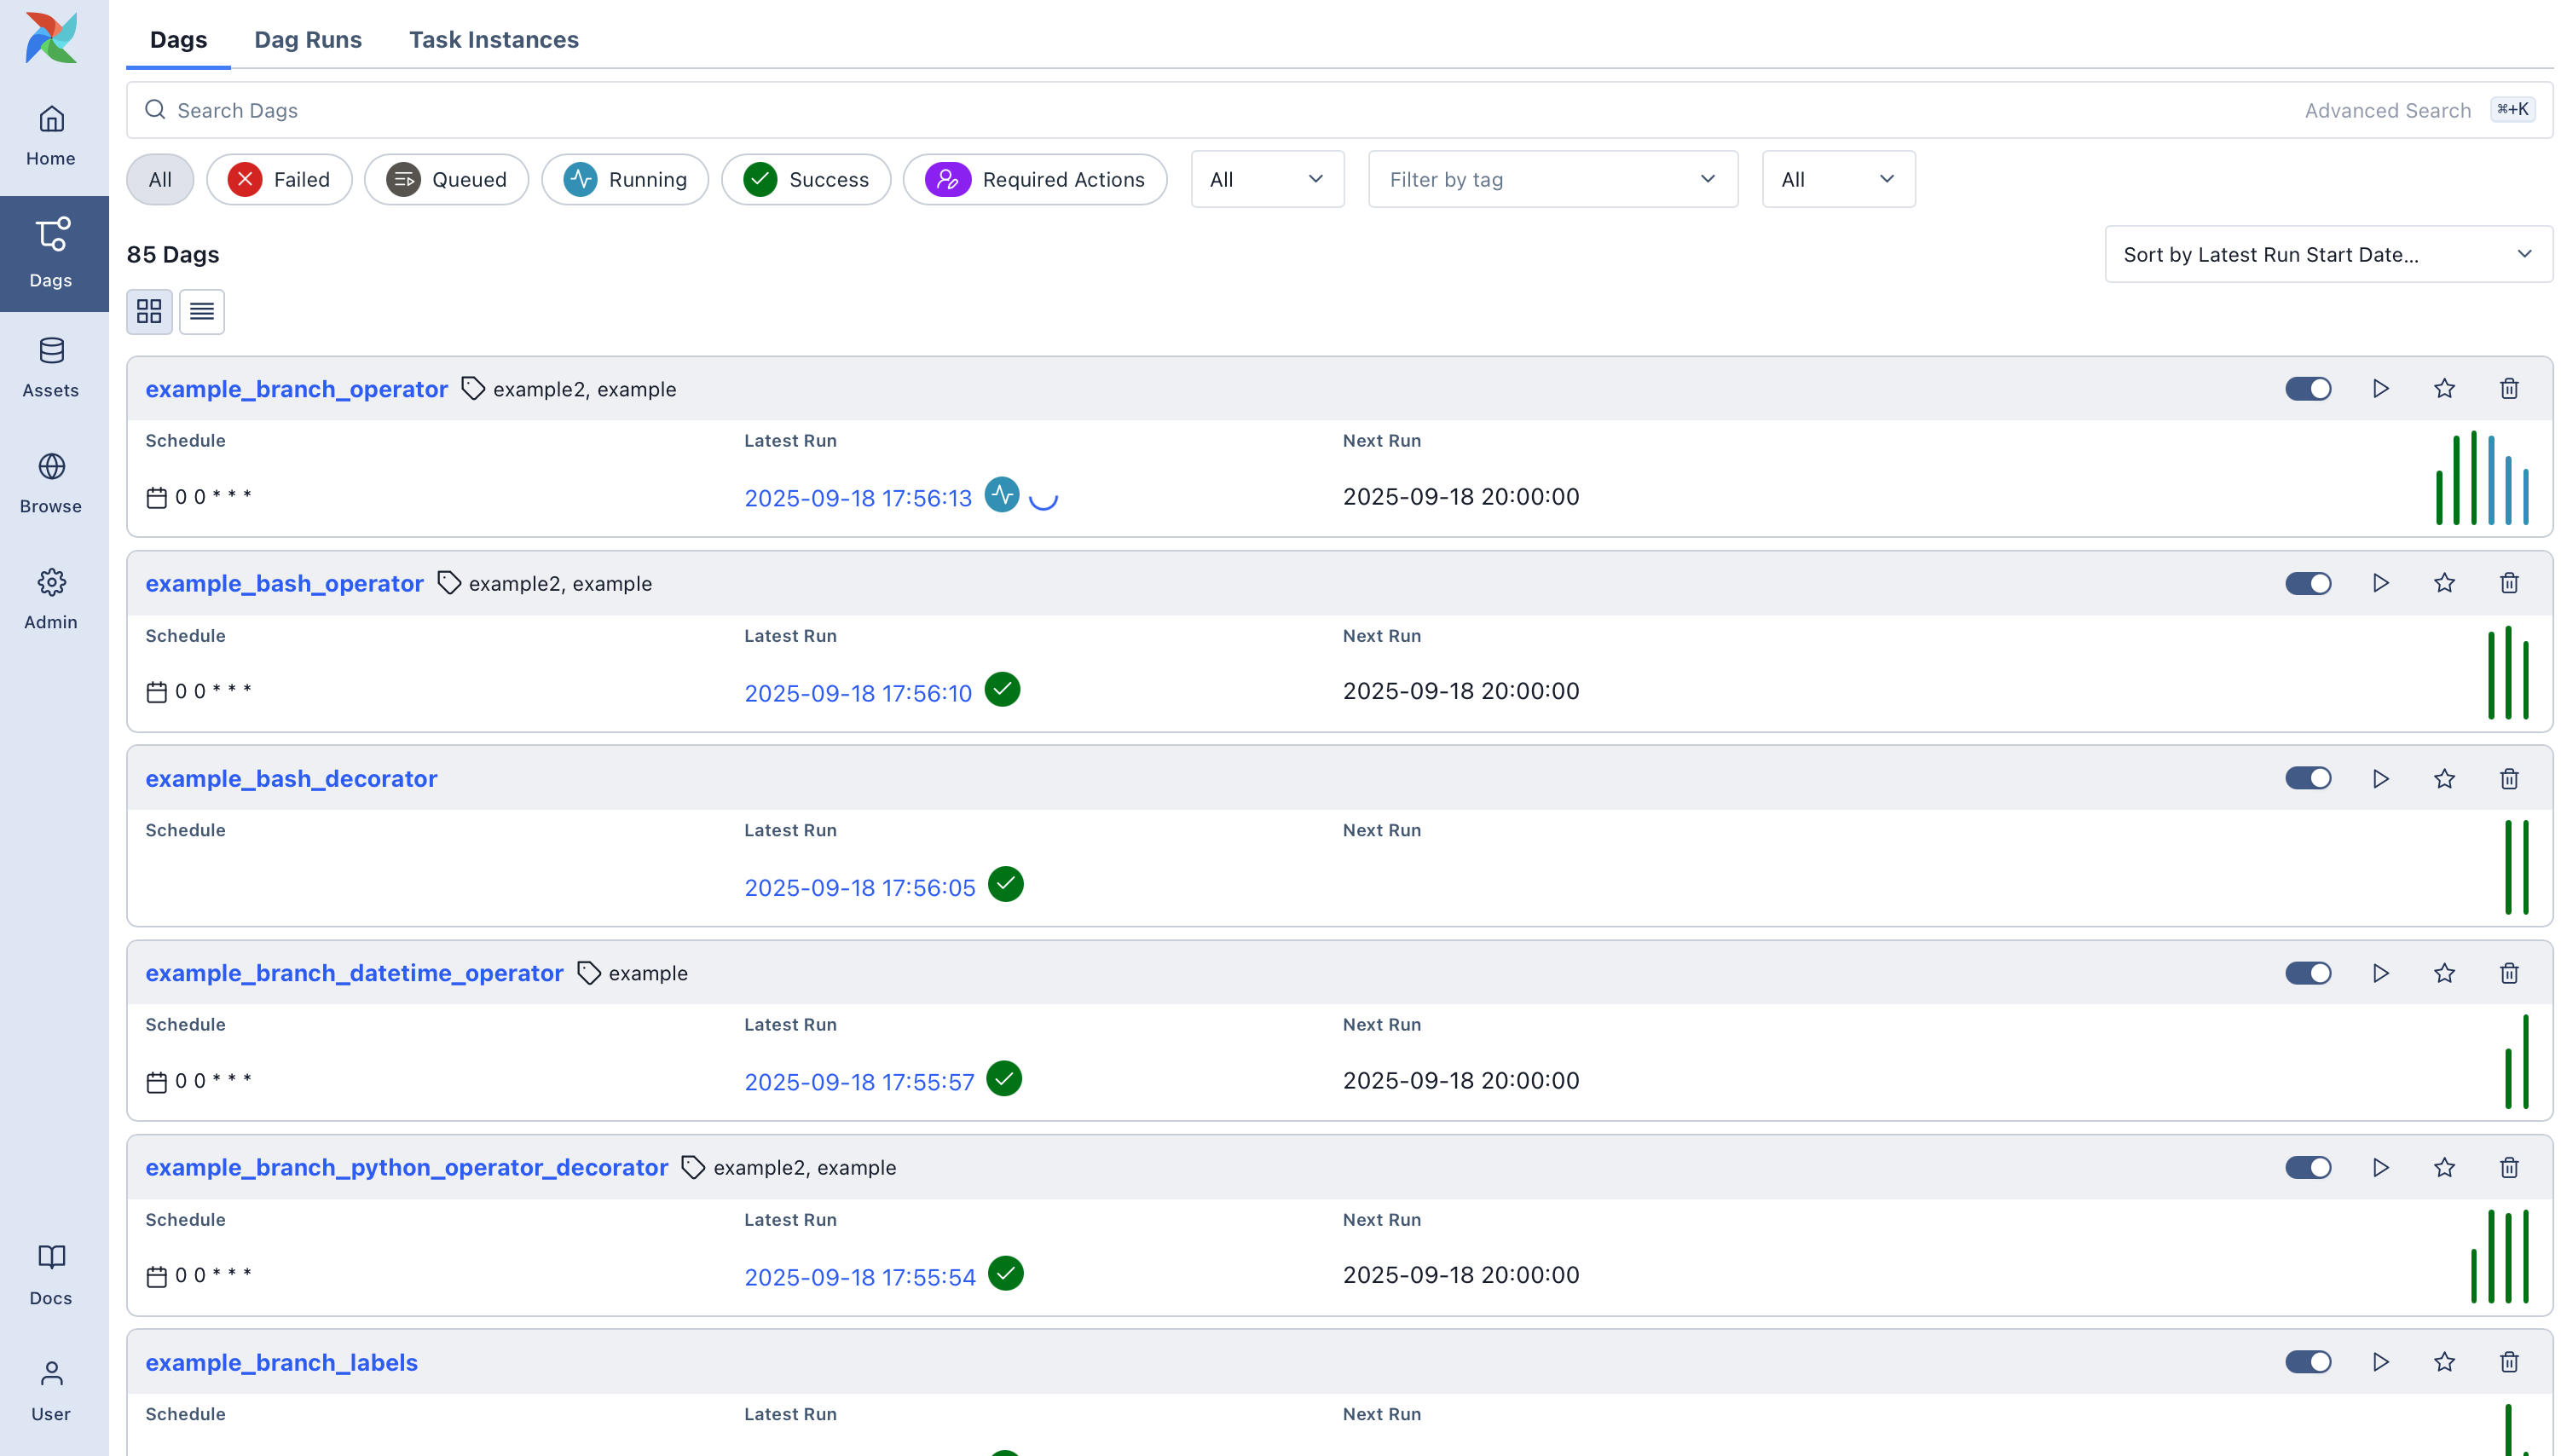
You will land on the DAGs page — the home screen listing all registered pipelines. On a fresh setup it shows the example DAGs bundled with Airflow.
Disable example DAGs
Open docker-compose.yaml in a text editor and change:
AIRFLOW__CORE__LOAD_EXAMPLES: 'true'
to:
AIRFLOW__CORE__LOAD_EXAMPLES: 'false'
Then restart:
docker compose down
docker compose up -d
23.9 Add Your First DAG
Drop any .py DAG file into the dags/ folder. Airflow picks it up automatically within about 30 seconds. No restart needed.
cp your_dag_file.py ./dags/
Here is a minimal working DAG to verify the setup end-to-end:
# dags/hello_airflow.py
from airflow.decorators import dag, task
from datetime import datetime

@dag(
    dag_id="hello_airflow",
    schedule="@once",
    start_date=datetime(2024, 1, 1),
    catchup=False,
    tags=["test"],
)
def hello_airflow():

    @task
    def say_hello():
        print("Airflow is running correctly!")
        return "hello"

    @task
    def say_world(greeting: str):
        print(f"{greeting} world — pipeline complete.")

    say_world(say_hello())

hello_airflow()
Copy it to the dags/ folder:
cp hello_airflow.py ./dags/
Wait 30 seconds and check the DAGs page in the UI. The hello_airflow DAG should appear. Click it, enable it with the toggle, and trigger a run manually. Watch it turn green.
If the DAG does not appear
python ./dags/hello_airflow.py
Any Python syntax errors will print immediately. This is the fastest way to debug a missing DAG.
23.10 Your Final Directory Structure
After setup, your project folder looks like this:
airflow-docker/
├── dags/                   ← your pipeline .py files
│   └── hello_airflow.py    ← example DAG
├── logs/                   ← auto-populated by Airflow
├── plugins/                ← custom operators
├── config/                 ← optional airflow.cfg overrides
├── docker-compose.yaml     ← service definitions
└── .env                    ← AIRFLOW_UID=50000
This is the layout you will work with throughout the Airflow chapters. Everything you build goes into dags/.
23.11 Using the Airflow CLI
You can run Airflow CLI commands without entering the container:
# List all registered DAGs
docker compose run --rm airflow-worker airflow dags list

# Manually trigger a DAG run
docker compose run --rm airflow-worker airflow dags trigger hello_airflow

# List task instances for a specific DAG run
docker compose run --rm airflow-worker airflow tasks list hello_airflow

# Test a single task without creating a DAG Run
docker compose run --rm airflow-worker airflow tasks test hello_airflow say_hello 2024-01-01
airflow tasks test is invaluable during development: it runs a single task function directly, bypassing the Scheduler, with no database state written. Use it to iterate quickly without triggering a full pipeline run.
23.12 Setting Up Connections
Before your DAGs can talk to databases or external services, you need to add Connections. Either through the UI or CLI:
Via the UI: Admin → Connections → + Add a new record
Via CLI (more repeatable):
# Add a PostgreSQL connection
docker compose run --rm airflow-worker airflow connections add my_postgres \
    --conn-type postgres \
    --conn-host localhost \
    --conn-port 5432 \
    --conn-login my_user \
    --conn-password my_password \
    --conn-schema my_db

# Add an AWS S3 connection
docker compose run --rm airflow-worker airflow connections add my_s3 \
    --conn-type aws \
    --conn-extra '{"aws_access_key_id": "AKIA...", "aws_secret_access_key": "..."}'
23.13 Stopping and Restarting
# Stop all containers, preserving data and logs
docker compose down

# Start again
docker compose up -d

# Full reset: removes all containers, volumes, and database history
docker compose down --volumes --remove-orphans
Use docker compose down for a normal stop. The full reset deletes all run history, task logs, connections, and variables stored in the database. Only use it when you want to start completely from scratch.
23.14 Viewing Container Logs
When something goes wrong, the first thing to check is the logs of the failing container:
# Scheduler logs — most failures start here
docker logs airflow-airflow-scheduler-1

# Webserver logs
docker logs airflow-airflow-webserver-1

# Worker logs
docker logs airflow-airflow-worker-1

# Live stream (follow mode)
docker logs -f airflow-airflow-scheduler-1
Common log patterns:
| Log message | What it means |
|---|---|
DAG file parsing failed | Syntax error in your DAG file |
Task failed with exception | The task code threw an error — check the task log in the UI |
Worker: Cannot connect to Redis | Redis container is not running |
Connection refused to postgres | PostgreSQL container not ready yet |
23.15 Troubleshooting
| Issue | Fix |
|---|---|
| UI not loading at localhost:8080 | Wait 2 min; run docker ps and confirm all containers are healthy |
| Port 8080 already in use | In docker-compose.yaml, change "8080:8080" to "8081:8080", then access at localhost:8081 |
| Permission errors on dags/ or logs/ | Confirm .env contains AIRFLOW_UID=50000; confirm the folders exist |
| DAG not appearing in UI | Run python your_dag.py to check for syntax errors; check Scheduler logs |
| Containers unhealthy after init | Insufficient memory — increase Docker memory to 4+ GB in Docker Desktop → Resources |
docker not found in Ubuntu | Docker Desktop → Settings → WSL Integration → enable Ubuntu → Apply & Restart |
airflow-init exits non-zero | Memory issue — increase Docker memory and re-run; check docker logs airflow-init-1 |
| XCom value missing in downstream task | Check that the upstream task returned a value (not None); verify task_id reference |
23.16 What the REST API Gives You
Airflow 3 ships with a full REST API at http://localhost:8080/api/v2. Useful for automation, monitoring, and CI/CD integration:
# Get a JWT token
TOKEN=$(curl -s -X POST "http://localhost:8080/auth/token" \
  -H "Content-Type: application/json" \
  -d '{"username":"airflow","password":"airflow"}' | jq -r '.access_token')

# List all DAGs
curl -H "Authorization: Bearer $TOKEN" http://localhost:8080/api/v2/dags

# Trigger a DAG run
curl -X POST -H "Authorization: Bearer $TOKEN" \
  -H "Content-Type: application/json" \
  -d '{"logical_date": "2024-01-01T00:00:00Z"}' \
  http://localhost:8080/api/v2/dags/hello_airflow/dagRuns
The REST API is how production monitoring tools, CI/CD pipelines, and custom dashboards integrate with Airflow — without needing direct database access.
Summary
Running Airflow with Docker starts with creating the project folders, downloading the official docker-compose.yaml, and writing AIRFLOW_UID=50000 to .env. On Windows, WSL 2 provides the Linux environment Docker needs — enable it with wsl --install -d Ubuntu and connect it through Docker Desktop WSL Integration. Run docker compose up airflow-init once to initialize the database, then docker compose up -d to start all six containers. The UI is at localhost:8080. Drop .py files into dags/ and the Scheduler picks them up within 30 seconds. When something breaks, docker logs on the Scheduler container is the first place to look. The Airflow CLI (airflow tasks test) lets you run individual tasks without the full Scheduler, making local iteration fast. The REST API at /api/v2 enables programmatic control for CI/CD and monitoring.