Chapter 22: Airflow Architecture
Airflow is not a single program you run. It is a system of cooperating components. Each one has exactly one job. They communicate through a central Metadata Database, so no component talks to another directly. When something goes wrong, understanding this separation is what tells you which component to look at. When you are designing a deployment, it is what tells you which component to scale.
This chapter explains every component, how they interact, how a task moves through the system from "scheduled" to "done," and what changed between Airflow 2 and Airflow 3.6
22.1 The Architecture at a Glance
       dags/ folder
            │  (Python files scanned every ~30s)
            ▼
       Scheduler  ◄──────────────────────► Webserver (UI)
            │                                    │
            ▼                                    │
       Metadata DB ◄────────────────────────────┘
            │
            ▼
        Executor
      ┌─────┼─────┐
   Worker Worker Worker
            │
        Triggerer  (async waits for external events)
Airflow is built on separation of concerns. Each component has one job, and they all communicate through the Metadata Database. No component commands another directly. The Scheduler writes to the database. The Executor reads from it. The Webserver reads from it to build the UI. Workers write back to it when tasks complete.
The result: every component is independently scalable, replaceable, and debuggable.
22.2 The Six Components
Webserver
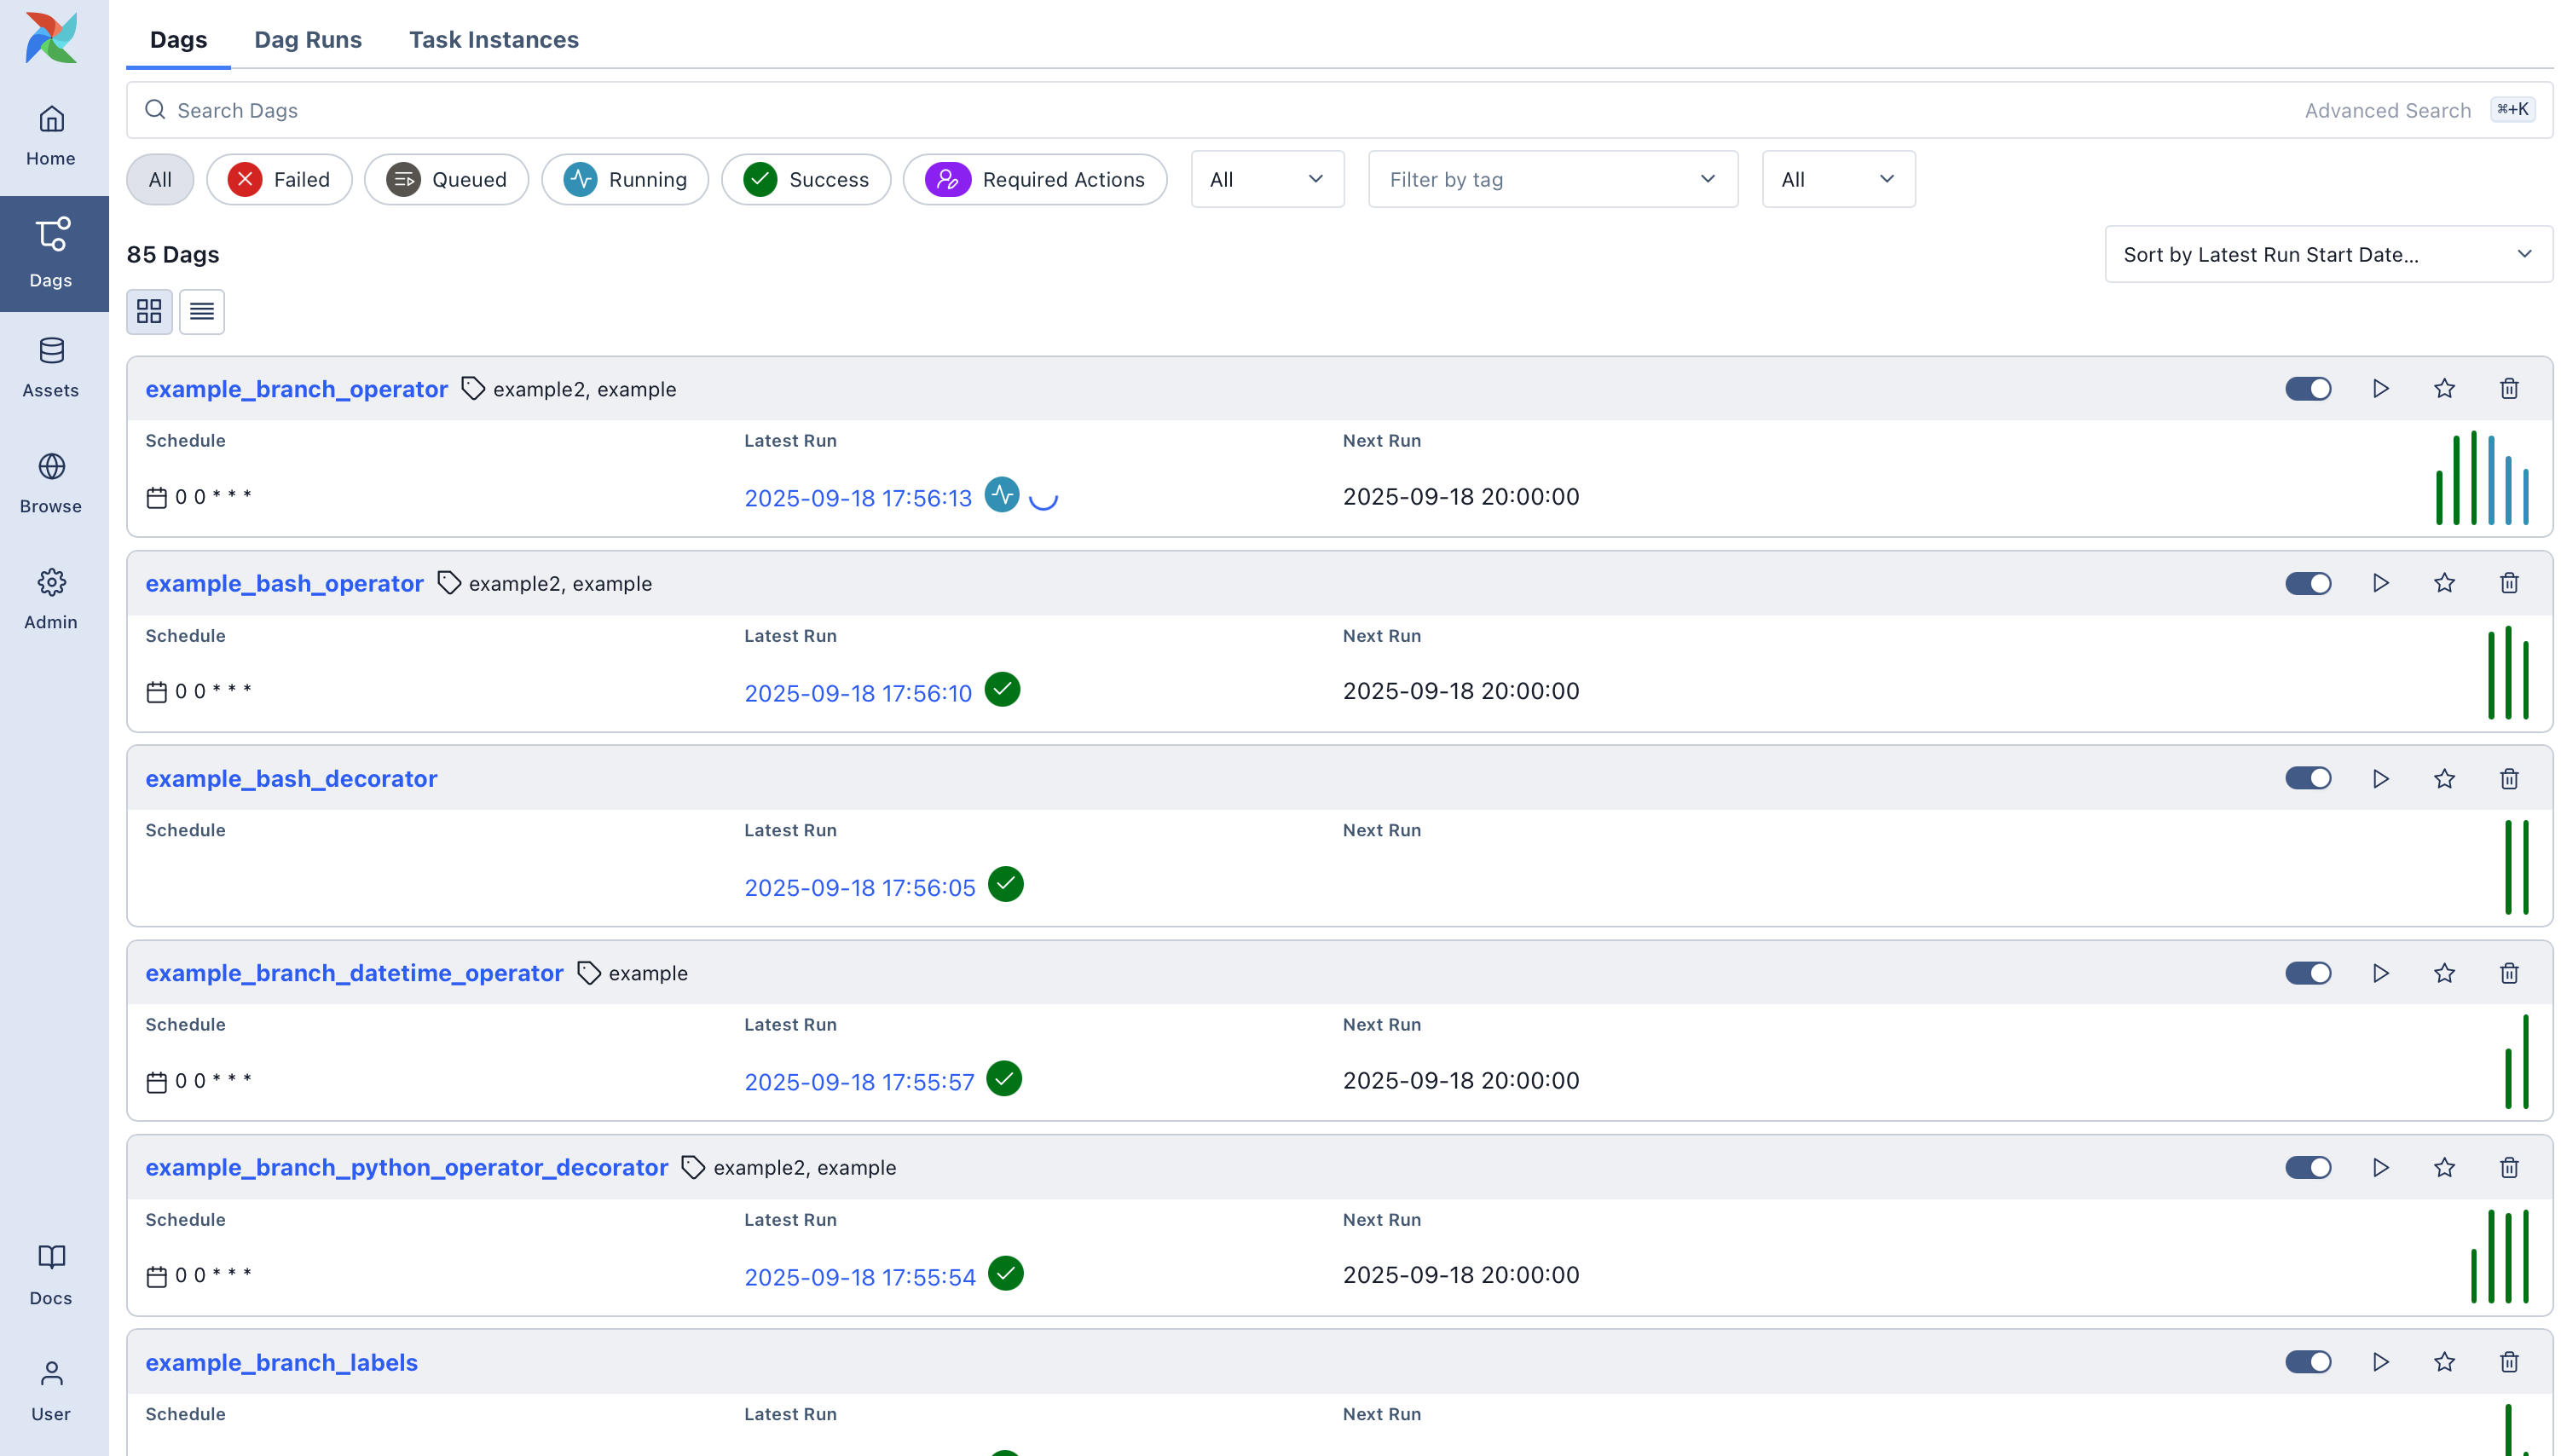
The Webserver serves the Airflow UI at http://localhost:8080. It reads state from the Metadata Database. It does not run, schedule, or execute anything. Its only job is presentation and interaction:
- Viewing all registered DAGs and their current state
- Triggering DAG runs manually
- Inspecting task logs
- Managing Connections and Variables
- Setting user permissions (role-based access)
Scheduler
The Scheduler is the heart of Airflow. It runs as a continuous process and does three things on a loop:
- Scans the
dags/folder, parses Python files, and registers any DAGs it finds - Checks whether any scheduled DAG is due to run based on its schedule and the current time
- Looks at each DAG's tasks, determines which are ready to execute (all dependencies met), and queues them for the Executor
The Scheduler does not run tasks itself. It only decides when they should run.
Every ~30 seconds:
  dags/ folder
      │
      ▼
  Parse .py files
      │
      ▼
  Any DAG due to run? ──No──► wait
      │ Yes
      ▼
  Create DAG Run
      │
      ▼
  Queue ready tasks
Executor
The Executor decides how tasks are run. It is a configuration setting, not a standalone process you interact with. It plugs into the Scheduler.
| Executor | How tasks run | When to use |
|---|---|---|
SequentialExecutor | One task at a time, same process | Dev and testing only |
LocalExecutor | Parallel subprocesses on one machine | Small teams, simple setups |
CeleryExecutor | Distributed workers via Redis or RabbitMQ | Production at scale |
KubernetesExecutor | One Kubernetes pod per task | Cloud-native, elastic scale |
The Executor does not run tasks itself. It dispatches them to Workers.
Worker
The Worker is the process that actually executes task code. When a task runs — the Python function, the SQL query, the API call — it runs inside a Worker. The Worker then writes the result (success or failure) and logs back to the Metadata Database.
- In
LocalExecutor: workers are subprocesses on the Scheduler's machine - In
CeleryExecutor: workers are separate machines receiving tasks from a message queue - In
KubernetesExecutor: each task spins up a fresh pod, runs, and terminates
Triggerer
The Triggerer handles deferrable tasks, tasks that wait for an external event such as:
- A file landing in S3
- An HTTP endpoint becoming available
- A database table exceeding a row count threshold
Without the Triggerer, these tasks would hold a Worker process hostage while they wait, blocking other work. The Triggerer handles the waiting asynchronously using Python's asyncio and only wakes a Worker when the condition is actually met.
# A deferrable sensor — does not hold a worker while waiting
from airflow.sensors.base import BaseSensorOperator
from airflow.triggers.temporal import TimeDeltaTrigger

class SmartFileSensor(BaseSensorOperator):
    def execute(self, context):
        self.defer(
            trigger=FileTrigger(path="/data/ready.flag"),
            method_name="resume"
        )

    def resume(self, context, event):
        # Worker only wakes here, after the file appears
        return event
Metadata Database
The Metadata Database is the single source of truth for the entire system. Every component reads from it and writes to it.
| What it stores | Examples |
|---|---|
| DAG metadata | DAG IDs, schedules, ownership, tags |
| Run history | Every DAG Run and when it happened |
| Task states | queued, running, success, failed, deferred |
| Logs | Task output and error messages |
| Connections | Database and API credentials |
| Variables | Environment-specific configuration |
| XCom values | Data passed between tasks |
Supported databases:
| Database | Use |
|---|---|
| PostgreSQL | Production (recommended) |
| MySQL | Production (supported) |
| SQLite | Development only: cannot run tasks in parallel |
When you see a task marked "failed" in the UI, you are looking at a row in the task_instance table with state = 'failed'. The Scheduler reads the same table to decide whether to retry.
DAG Folder
The dags/ folder is a directory of Python files. The Scheduler scans it on a loop (every 30 seconds by default) and registers any DAGs it finds. In Docker, this folder is volume-mounted into the containers, so dropping a new .py file there is all it takes to deploy a new pipeline. No restart required.
22.3 How a DAG Run Works: Step by Step
Step 1  You drop sales_pipeline.py into dags/
            │
Step 2  Scheduler parses it → stores metadata in the DB
            │
Step 3  At @daily schedule → Scheduler creates a DAG Run
            │
Step 4  Tasks with no upstream dependencies → state set to "queued"
            │
Step 5  Executor picks up queued tasks → dispatches to Workers
            │
Step 6  Worker runs the task → writes logs → updates state in DB
            │
Step 7  Scheduler sees completed tasks → queues downstream tasks
            │
Step 8  Repeat until all tasks succeed or one fails
            │
Step 9  Webserver reflects the final state in the UI
No step is skipped. A task that appears stuck is always stuck at one of these nine points. Knowing the architecture tells you which component to investigate.
Interview Angle "Walk me through what happens when an Airflow task runs." The strong answer traces all nine steps above, naming each component: Scheduler reads the DAG, creates the Run, queues the task; Executor dispatches to a Worker; Worker runs the code and writes back to the Metadata DB; Scheduler sees the success and queues downstream tasks; Webserver shows the final state. Mentioning that no component talks to another directly (everything routes through the DB) demonstrates a real understanding of the design, not just memorized keywords.
22.4 Task Lifecycle States
A task instance moves through states as it progresses through the system:
  none
    │
    ▼
  scheduled
    │
    ▼
  queued ──────────────────────────────────────► deferred
    │                                                 │
    ▼                                                 │ (external event fires)
  running                                             │
    │                                                 ▼
    ├──► success                                   queued again
    │
    ├──► failed ──► up_for_retry ──► queued (again)
    │
    ├──► skipped     (branch logic chose another path)
    │
    └──► upstream_failed   (a parent task failed, blocking this one)
Debugging guide:
| State | What it means | Where to look |
|---|---|---|
queued — stuck | Executor has no workers available | Worker count, resource limits |
running — stuck | Task is hanging or waiting | Task logs, external service |
up_for_retry | Failed, retries remaining | Task logs for the error |
upstream_failed | Parent task failed | Go fix the parent task first |
deferred | Waiting for external event | Triggerer logs |
22.5 XCom: Passing Data Between Tasks
Tasks run as isolated processes. By design, they do not share memory. XCom (cross-communication) is how tasks share small pieces of data.
A task pushes a value into the Metadata DB. A downstream task pulls it by task ID.
Old-style XCom (Airflow 2 compatible):
def push_data(**context):
    context['ti'].xcom_push(key='record_count', value=4500)

def pull_data(**context):
    count = context['ti'].xcom_pull(task_ids='push_task', key='record_count')
    print(f"Records processed: {count}")
TaskFlow API (preferred in Airflow 3):
from airflow.decorators import task, dag
from datetime import datetime

@dag(schedule="@daily", start_date=datetime(2024, 1, 1))
def sales_pipeline():

    @task
    def extract() -> dict:
        return {"record_count": 4500, "source": "sales_api"}

    @task
    def transform(data: dict) -> dict:
        print(f"Processing {data['record_count']} records from {data['source']}")
        return {"processed": data['record_count'], "status": "clean"}

    @task
    def load(result: dict):
        print(f"Loading {result['processed']} records — status: {result['status']}")

    load(transform(extract()))

sales_pipeline()
With the TaskFlow API, XCom is invisible. Return a value from one task, accept it as a parameter in the next. Airflow handles the push/pull automatically.
XCom is only for small values: IDs, counts, file paths, status strings. Passing large datasets through XCom is an anti-pattern — it stores in the Metadata Database, which is not designed for bulk data. Pass a file path or S3 key instead, and let the downstream task read the data directly.
22.6 Connections and Variables
Airflow provides two mechanisms for keeping configuration and credentials out of DAG code.
Connections
Connections store external service credentials: database hosts, API keys, S3 bucket access. A Connection is given a conn_id, and operators reference it by that ID:
# No credentials in the code at all
PostgresOperator(
    task_id="run_query",
    postgres_conn_id="prod_postgres",   # looks up the connection by ID
    sql="SELECT COUNT(*) FROM orders;"
)
The actual host, port, username, and password live in the Metadata Database or in a secrets backend (AWS Secrets Manager, HashiCorp Vault, GCP Secret Manager). Rotating credentials means updating the Connection once, not touching every DAG.
Set a Connection via the UI: Admin → Connections → Add Connection
Or via CLI:
airflow connections add prod_postgres \
    --conn-type postgres \
    --conn-host my-db-host.rds.amazonaws.com \
    --conn-port 5432 \
    --conn-login airflow_user \
    --conn-password secretpassword \
    --conn-schema my_database
Variables
Variables are key-value pairs for environment-specific configuration:
from airflow.models import Variable

# Read a variable — value comes from the DB, not hardcoded
bucket = Variable.get("s3_output_bucket")         # "my-prod-bucket"
threshold = Variable.get("alert_threshold", default_var="100")

# Variables can also store JSON
config = Variable.get("pipeline_config", deserialize_json=True)
A Variable can be updated in the UI or via CLI without touching or redeploying any DAG code.
22.7 Airflow 2 vs Airflow 3
This book uses Airflow 3. If you encounter older tutorials, here is what changed:
| Feature | Airflow 2 | Airflow 3 |
|---|---|---|
| Python support | 3.6+ | 3.9+ |
| DAG authoring | Operators + TaskFlow API | TaskFlow API is primary |
| Scheduling | Time-based only | Time-based + event-driven (Assets) |
schedule_interval | Available | Removed: use schedule= |
execution_date | Primary run identifier | Replaced by logical_date |
catchup default | True | False |
| SubDAGs | Supported | Removed: use TaskGroups |
airflow.contrib.* | Available | Removed: use airflow.providers.* |
| UI framework | Angular | React (faster, real-time, unified) |
| REST API | v1, partial | v2, full OpenAPI 3.1 |
| Scheduler reliability | Single process, HA issues | Refactored, more stable |
| Task execution | Subprocess on shared worker | Pluggable Task Execution Interface |
The Three Changes That Break Things Most Often
1. schedule_interval → schedule
# Airflow 2 — now broken
schedule_interval="@daily"

# Airflow 3 — correct
schedule="@daily"
2. execution_date → logical_date
# Airflow 2 — now broken
context["execution_date"]

# Airflow 3 — correct
context["logical_date"]
3. catchup default changed from True to False
# Always set this explicitly to avoid surprises
with DAG("my_dag", catchup=False, ...):
In Airflow 2, catchup=True was the default. Creating a DAG with a start_date two weeks in the past would immediately trigger 14 historical runs. In Airflow 3, the default is False. Still, always set it explicitly.
Interview Angle "What changed between Airflow 2 and Airflow 3?" Key points:
schedule_interval→schedule, event-driven scheduling via Assets,execution_date→logical_date, SubDAGs removed in favour of TaskGroups, and the rebuilt React UI. Knowing the migration path signals you have worked with real production codebases, not just toy examples.
22.8 Dynamic Task Mapping
Airflow 3 supports dynamic task mapping: generating tasks at runtime based on the output of a previous task. This removes the need to hardcode task counts.
from airflow.decorators import task

@task
def get_files() -> list[str]:
    return ["sales_2024_01.csv", "sales_2024_02.csv", "sales_2024_03.csv"]

@task
def process_file(filename: str):
    print(f"Processing {filename}")

# Generates one task per file — dynamically, at runtime
files = get_files()
process_file.expand(filename=files)
The DAG view in the UI shows all dynamically generated tasks, each with its own log and state. This is a pattern that used to require complex workarounds in Airflow 2.
Summary
Airflow is a system of six components built around a central Metadata Database. The Scheduler decides when tasks run. The Executor decides how. Workers execute the code. The Webserver shows everything. The Triggerer handles async waits without blocking workers. The DAG folder is where pipeline code lives. Every component reads from and writes to the Metadata Database — no direct component-to-component communication. A task moves through states from queued to running to success or failed, and the Scheduler reads those states to determine what to queue next. XCom passes small values between tasks via the database. Connections keep credentials out of DAG code. Variables store environment-specific config. Airflow 3 is a major upgrade: schedule_interval → schedule, execution_date → logical_date, SubDAGs removed, event-driven scheduling added via Assets, and the UI rebuilt from scratch in React.